

Kubeflow on Minikube Cluster
You can deploy the Kubeflow pipeline on Kubernetes/minikube cluster on Windows host machine powershell with administrative privileges using the following few commands :
set PIPELINE_VERSION=2.0.0
kubectl apply -k "github.com/kubeflow/pipelines/manifests/kustomize/cluster-scoped-resources?ref=$PIPELINE_VERSION"
kubectl wait --for condition=established --timeout=60s crd/applications.app.k8s.io
kubectl apply -k "github.com/kubeflow/pipelines/manifests/kustomize/env/platform-agnostic-pns?ref=$PIPELINE_VERSION"

Run the Kubectl command to view the Pod's status
kubectl get pods -A
It'll show all the pods in the default as well as the Kubeflow namespace.

Port-forward the Kubeflow service to view Kubeflow dashboard
Use the below command for port-forward :
kubectl port-forward -n kubeflow svc/ml-pipeline-ui 8080:80
It'll give the local IP address through which we can view our Kubeflow dashboard.

Open the Web Browser and open localhost at port 8080
After opening the localhost:8080 you can view your Kubeflow dashboard.

Hence, we have successfully installed and configured the Kubeflow on our minikube cluster.
Note: This is the basic version of Kubeflow that run on the local machine, but the catch is this local deployment of Kubeflow is not complete as it lacks some of the important fields like the Notebook section, Volume section, TensorBoard section and much more important fields from the dashboard.
Artifact storage for all the data ouputs in kubeflow pipeline
In order to provide a single source of truth where all your working data (training and testing data, saved ML models etc.) is available to all your components, using an object storage is a recommended way. For our app, we will setup MinIO.
Since Kubeflow has already setup a MinIO tenant, we will leverage the mlpipeline bucket. But you can also deploy your own MinIO tenant.
Get credentials from Kubeflow's integrated MinIO
Obtain the accesskey and secretkey for MinIO with these commands:
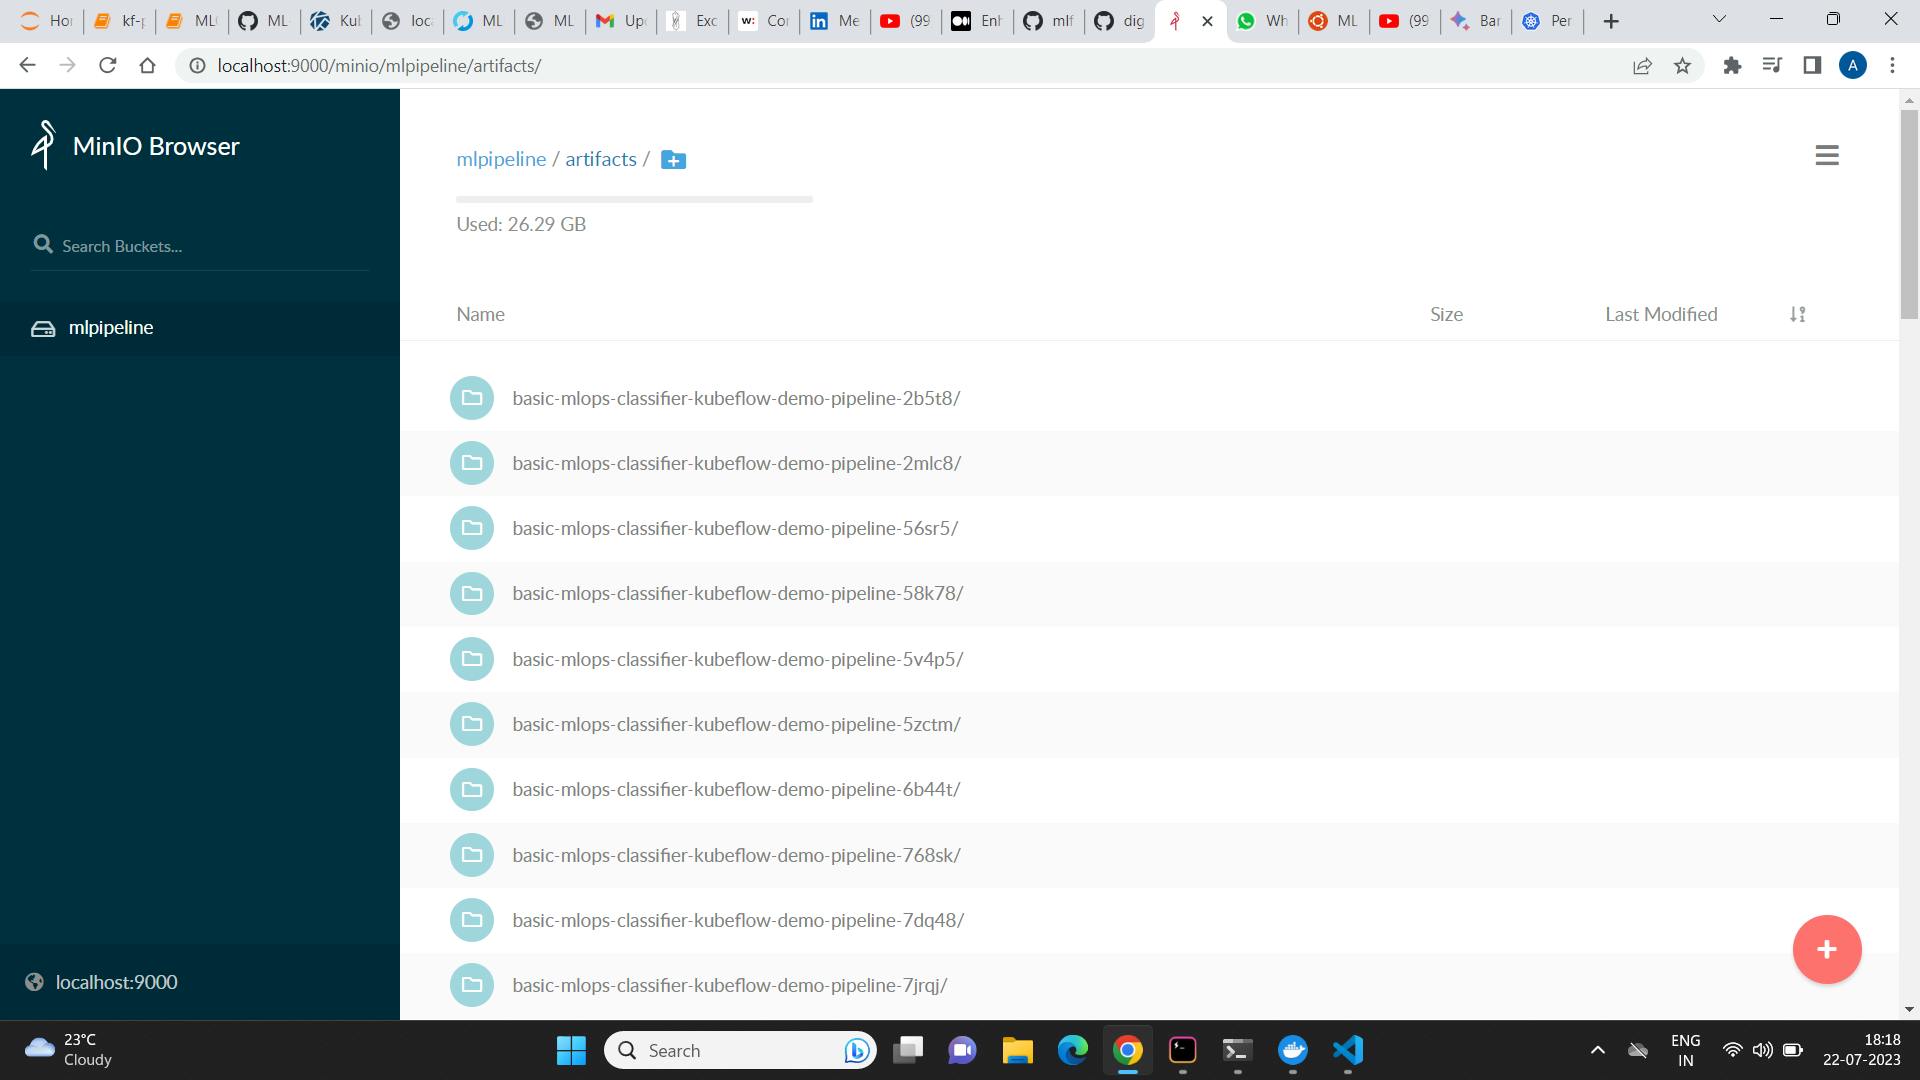
kubectl get secret mlpipeline-minio-artifact -n kubeflow -o jsonpath="{.data.accesskey}" | base64 --decodekubectl get secret mlpipeline-minio-artifact -n kubeflow -o jsonpath="{.data.secretkey}" | base64 --decodeIn order to get access to MinIO from outside of your Kubernetes cluster and check the bucket, do a port-forward:
kubectl port-forward -n kubeflow svc/minio-service 9000:9000Then you can access the MinIO dashboard at http://localhost:9000 and check the bucket name or create your own bucket.
Deploying the complete kubeflow on the minikube cluster
I always get this error. It was very frustrating. and till now it is not resolved. I tried all possible ways to get kubeflow to work on minikube , It never worked.
failed to build kfApp from URI raw.githubusercontent.com/kubeflow/manifest..: couldn't generate KfApp: (kubeflow.error): Code 500 with message: kfApp Generate failed for kustomize: kustomize generate failed Error: (kubeflow.error): Code 500 with message: couldn't generate kustomization file for component kfserving
and INFO[0003] Processing application: metacontroller filename="kustomize/kustomize.go:408"
WARN[0003] Cannot get kustomization from /tmp/hello-kf-Darwin/kustomize/metacontroller/base: error open /tmp/hello-kf-Darwin/kustomize/metacontroller/base/kustomization.yaml: no such file or directory filename="kustomize/kustomize.go:524".
Deploying the complete kubeflow using Charmed Kubeflow.
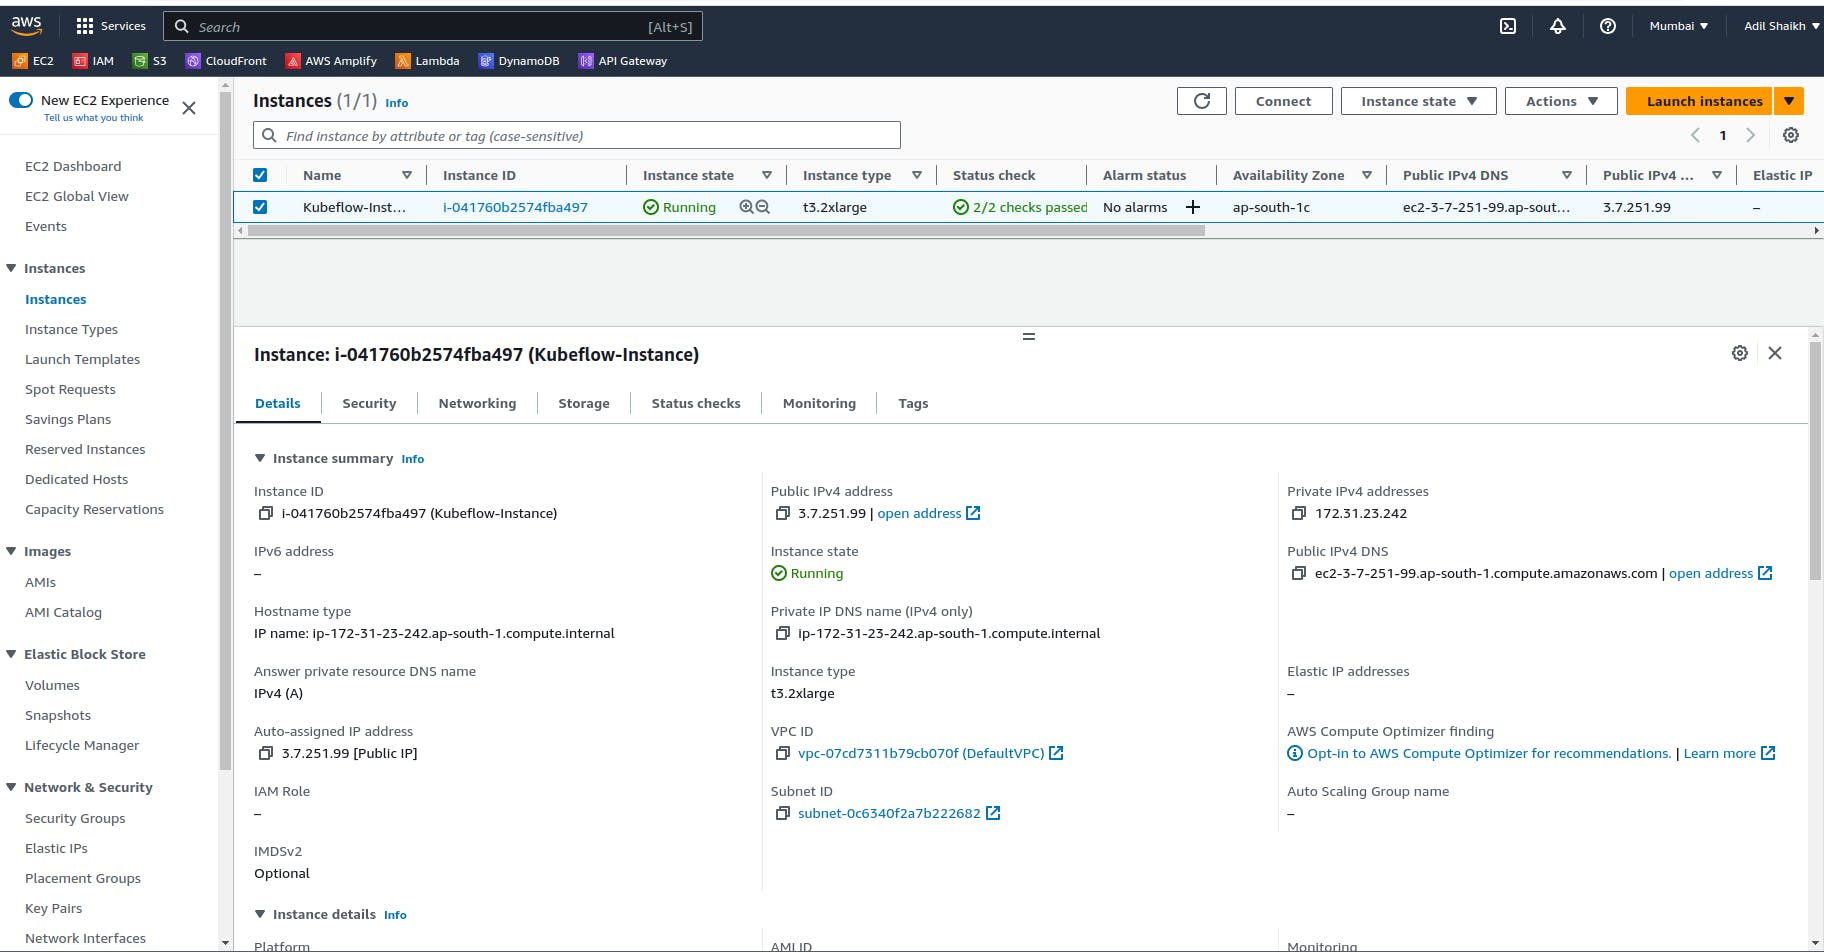
We will create an Ubuntu VM first. I have created an instance on AWS EC2 Instance(t3.2xlarge).
VM Requirements:
VM OS — Ubuntu 20.04 LTS
16 GB RAM
6 vCPUs
The official site recommends machine with 250 GB storage, I have made a 150 GB one. Ensure that the root is allocated at least 50GB.
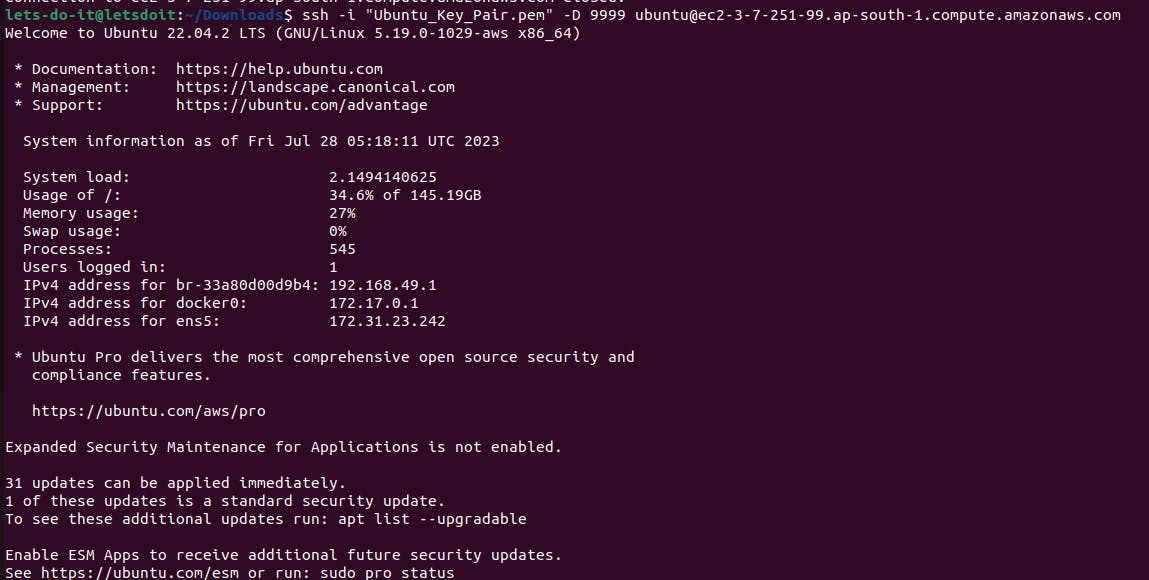
SSH Into EC2-Instance using the Key-pair.pem file.
Installing microk8s on the VM
To run and deploy Kubeflow, the remote instance will need some software installed. As well as MicroK8s itself and Juju, some additional applications will be needed for use as a development system.
sudo snap install microk8s --classic --channel=1.22/stable
add the user to the MicroK8s group:
  sudo usermod -a -G microk8s $USER
  newgrp microk8s
copy the Kubernetes configuration to the default location:
  mkdir ~/.kube
  microk8s config > .kube/config
  sudo chown -f -R $USER ~/.kube
  sudo snap alias microk8s.kubectl kubectl
configure MicroK8s addons:
microk8s enable dns storage rbac metallb:"10.64.140.43-10.64.140.49,192.168.0.105-192.168.0.111"
The next step is to install juju components:
for snap in juju juju-wait juju-kubectl juju-bundle; do
    sudo snap install $snap --classic;
done
Now you can connect Juju to Kubernetes:
add the cluster:
juju add-k8s myk8screate a controller:
juju bootstrap myk8s my-controllercreate a model and namespace named
kubeflow:juju add-model kubeflow
Finally, we’re ready to deploy Charmed Kubeflow! Go ahead and run this code to deploy the Charmed Kubeflow bundle with Juju:
juju deploy kubeflow --trust --channel=1.7/stable
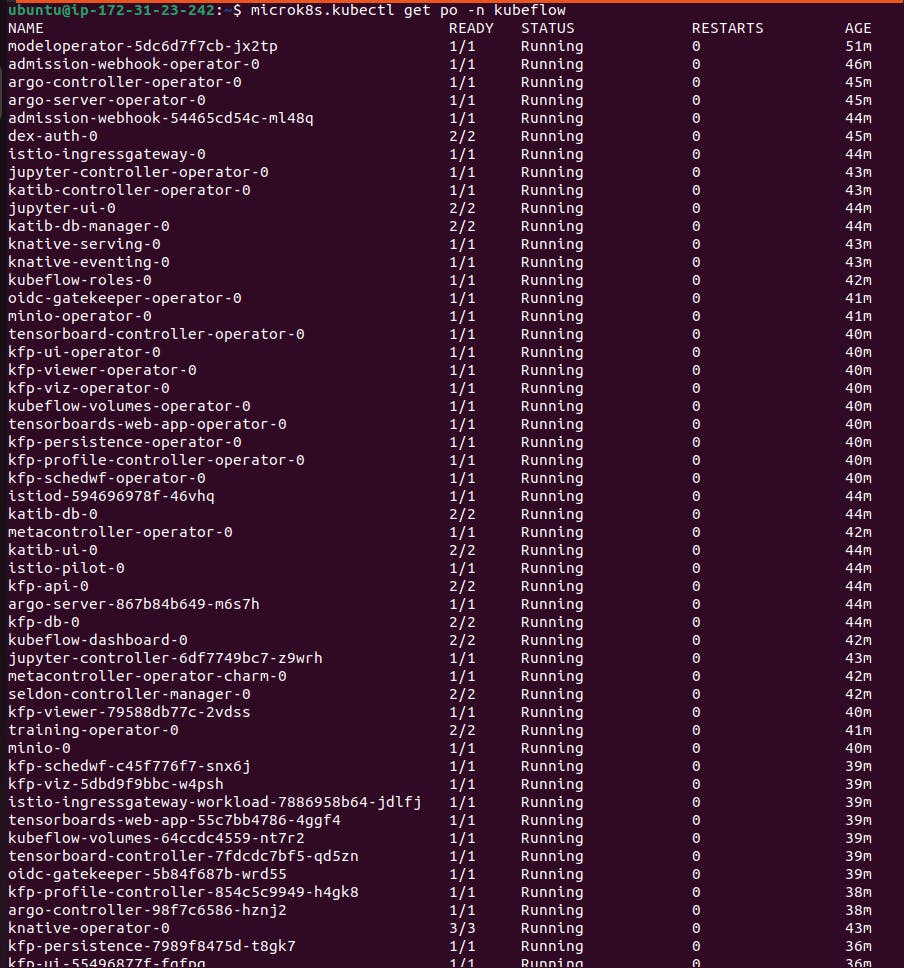
It may takes some time to all the pods to get into the the running state.You can see the status of the pod using the command:
microk8s kubectl get po -n kubeflow
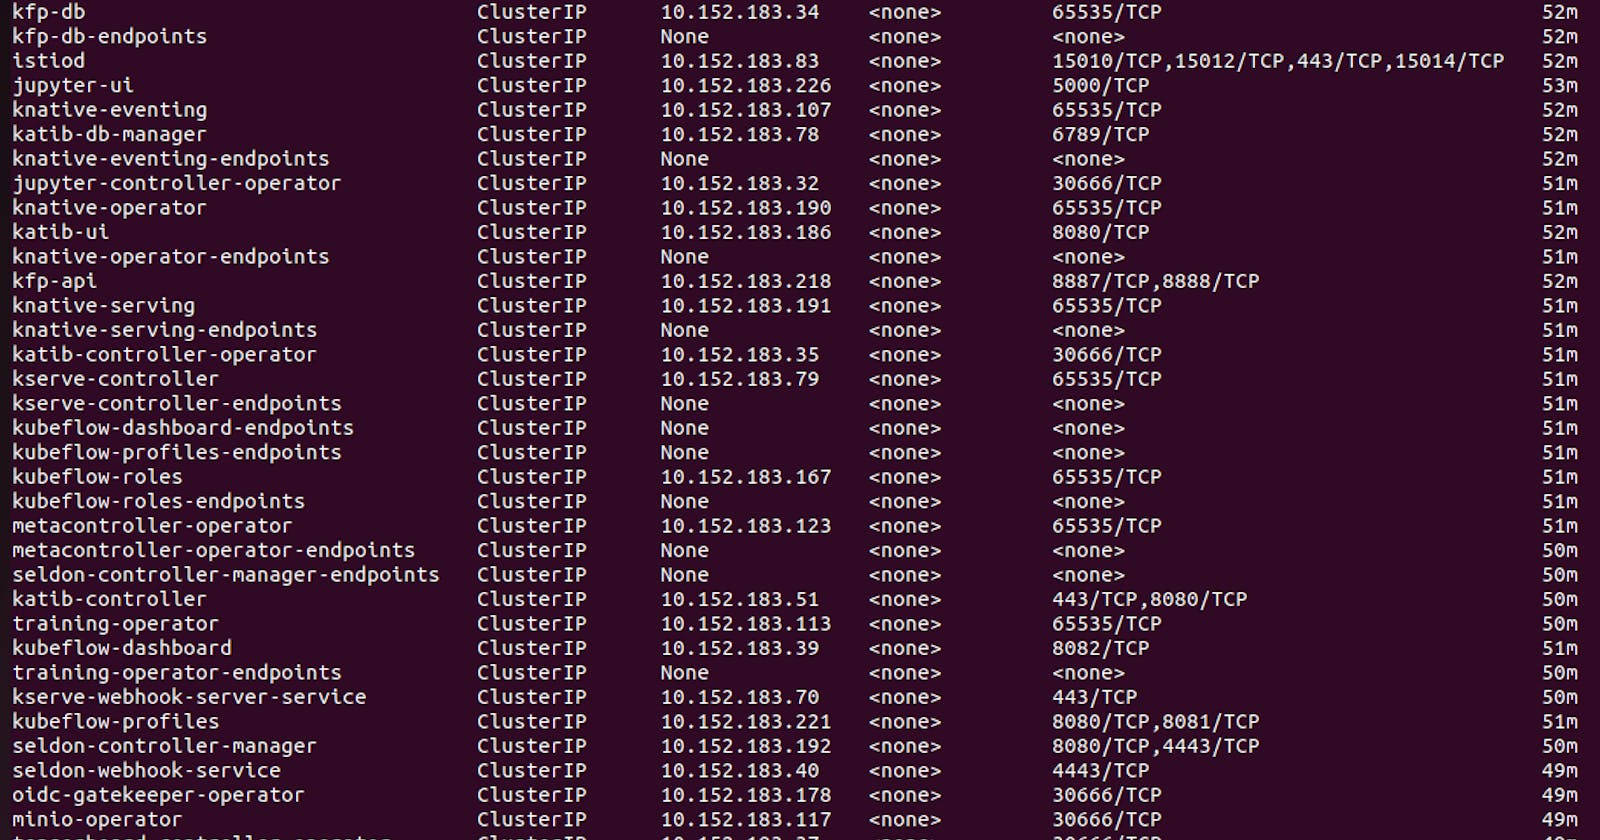
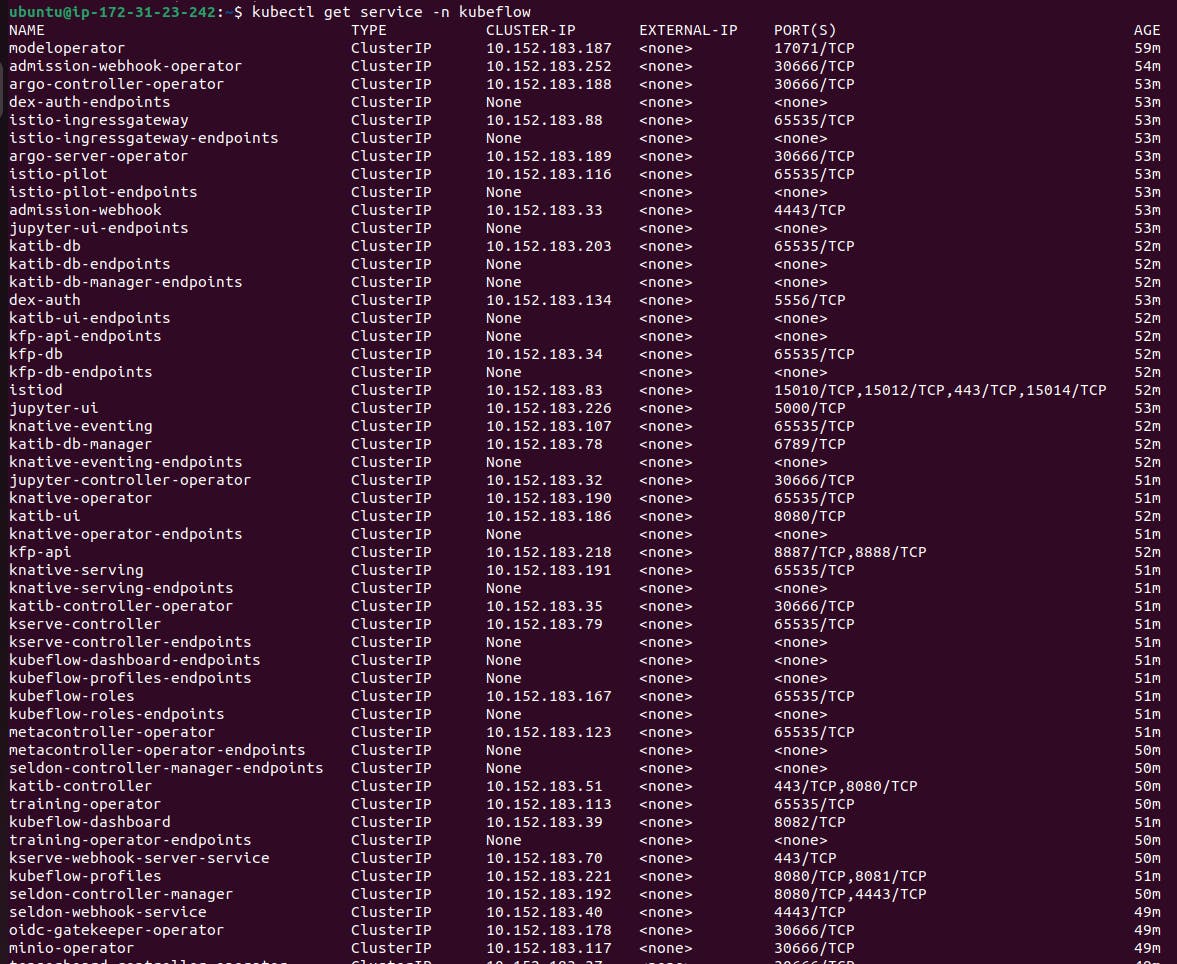
Also you can view all the services in the 'kubeflow' namespace using command:
microk8s kubectl get svc -n kubeflow
Deploying Mlflow to the kubeflow namespace using juju:
In a terminal, deploy mlflow-server and charmed-osm-mariadb-k8s as its relational database, mlflow-db:
juju deploy mlflow-server
juju deploy charmed-osm-mariadb-k8s mlflow-db
Integrate mflow-server with mlflow-db. This will ensure that MLflow has a relational dabatase connection to MariaDB. Also integrate mlflow-server with the minio, admission-webhook, and istio-pilot components of Charmed Kubeflow (that were already deployed when you deployed Charmed Kubeflow). minio will give MLflow server access to the object storage; admission-webhook will give user the ability to connect to MLFlow through secrets; and istio-pilot will connect MLflow to Istio.
juju relate mlflow-server mlflow-db
juju relate mlflow-server minio
juju relate mlflow-server istio-pilot
juju relate mlflow-server admission-webhook

In a few minutes our Mlflow pods will also be running in the kubeflow namespace.

Configure Dashboard Access :
In order to access kubeflow through its dashboard service, we’ll need to configure the bundle a bit so that it supports authentication and authorization. To do so, run these commands:
juju config dex-auth public-url=http://10.64.140.43.nip.io
juju config oidc-gatekeeper public-url=http://10.64.140.43.nip.io
This tells the authentication and authorization components of the bundle that users who access the bundle will be doing so via the URL http://10.64.140.43.nip.io. In turn, this allows those components to construct appropriate responses to incoming traffic.
To enable simple authentication, and set a username and password for your Kubeflow deployment, run the following commands:
juju config dex-auth static-username=admin
juju config dex-auth static-password=admin
Configure your Ubuntu network settings to use a SOCKS proxy
On your laptop’s network settings:
Open
Settings > Network > Network Proxy.Set the network proxy to ‘Manual’.
Set the SOCKS host to:
127.0.0.1and port9999.
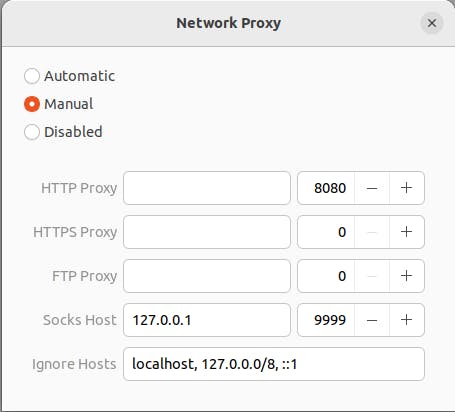
Note: Once this is done, all your network traffic will go through the SSH tunnel to the VM. If the SSH tunnel is closed, then you’ll lose the internet.
Now close the SSH connection and log in again using the "-D 9999".Then you can access your Kubeflow dashboard.
Verify Charmed Kubeflow Deployment
Open a browser and visit the following URL:
http://10.64.140.43.nip.io
You should then see the dex login screen. Enter the username (it does say email address, but whatever string you entered to configure it will work fine) and your password from the previous configuration step.
Once you click on the “Finish” button, the Dashboard will be displayed!

Hence, uptil now we have successfully installed the Complete kubeflow using charmed kubeflow and microk8s.It contains all the necessary fields in the dashboard which was not present in the previous case of the Kubeflow.
Access the MLflow dashboard
In our case we are using microsk8s.The MLflow dashboard is always available at http://10.64.140.43.nip.io/mlflow/#/.

Hence, we have successfully installed the Kubeflow and Mlflow on the same kubernetes cluster. As well as integrated the MLflow as a part of the Kubeflow.